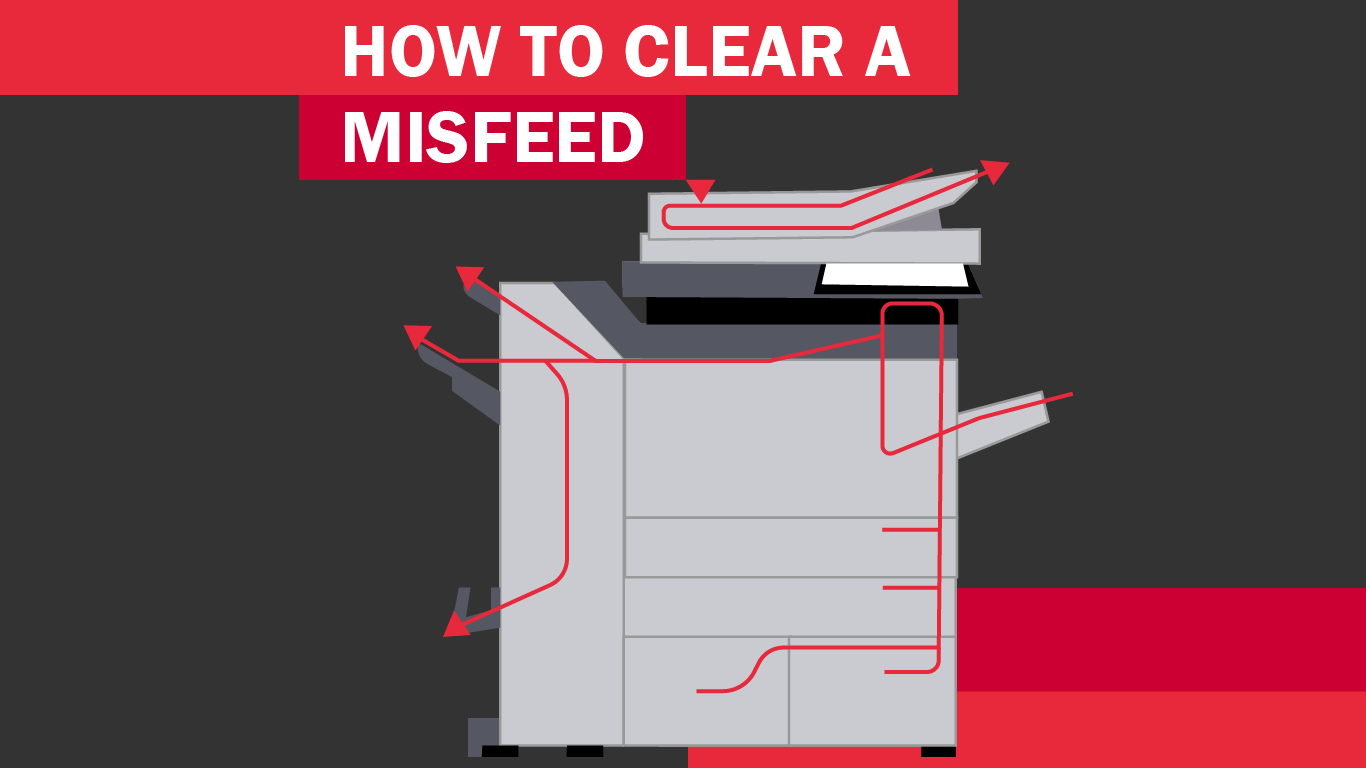
There are several places inside of your copier where paper can become jammed. On your Sharp Copier, the touchscreen will show you an illustration of the machine’s paper paths, and where the misfeed has occurred. You can also tap the “check how to remove misfeeds” button on the screen for more detailed instructions on how to proceed.
Clearing the Document Feeder
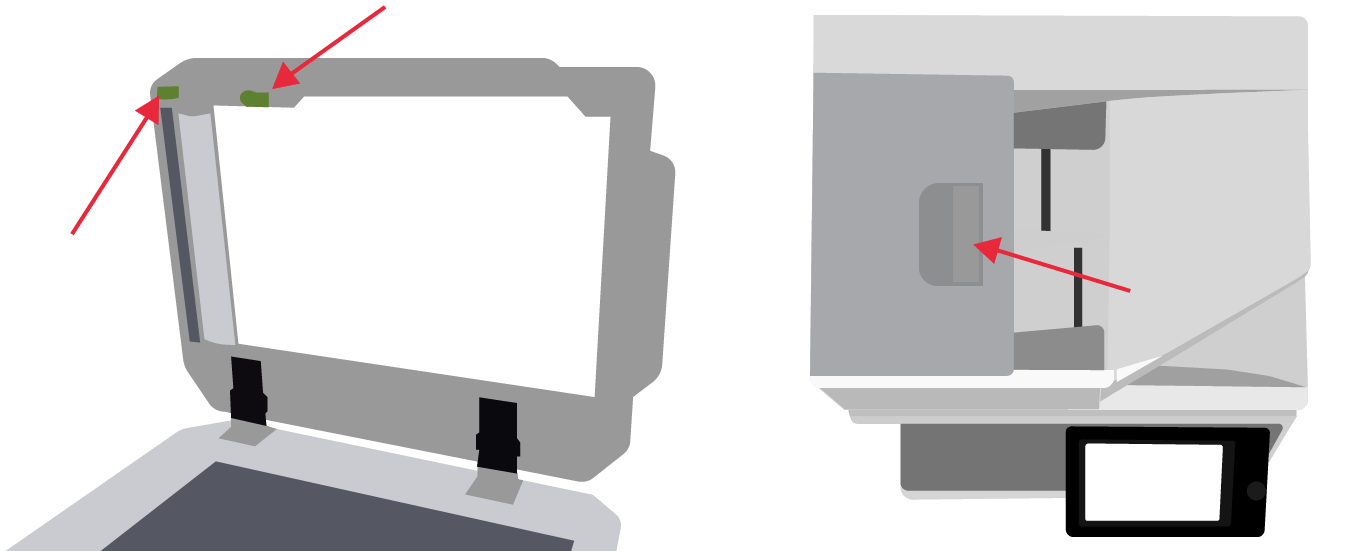
This type of misfeed is usually very simple to clear. You should first lift the lid to check for any sign of paper near the edge of the lid. There is a roller you can spin to manually get the paper to roll out of that part of the lid. There is also a release button on the inside of the lid, which will release the bottom of the lid to expose the upper scanner. If you are unable to see the paper in the underside of the lid, there is a small compartment on the top of the lid you can check. It is accessible by a handle. Pull on the handle and the compartment will open up, allowing you to see any paper stuck inside. Once you have found the paper, removed it from the paper path, and closed the lid, your misfeed error should be cleared.

Clearing the Right Side
If a misfeed has occurred on the right side of your machine, near the bypass tray, you can easily open up the right side of your copier to clear the page. Simply find the release lever and pull directly out. Once you have a view of the inside, you can look for the paper causing the issue. If you see the paper, but aren’t able to get it loose, you can feed it further through the paper path by manually turning the gear or lever to free the paper. Once the door is closed again, you should be able to pick back up where you left off with your copy/print job. One word of caution though, the fusing unit is located on this side of the copier. It can be very hot, so be careful not to touch it.
More Areas to Check
If a page misfeeds further along in a print job, there are a number of other areas you can look. Watch the video below to see where you can find and how to open the various compartments on your Sharp copier.
Tips to Prevent Misfeeds
Fan the Paper
If you fan your paper before loading it, it prevents multiple sheets from becoming stuck to each other. If multiple sheets feed through at once, this can cause a misfeed.
Gently Close the Paper Trays
Slowly, but firmly close the paper tray when loading your paper. When you forcefully close the trays, it can cause the paper to skew, which can make it misfeed.
Use the Correct Settings
If you load a different type of paper from what was previously in the tray, be sure to check your settings and adjust them to account for the change in paper. Having the wrong paper weight or size for the settings can cause misfeeds.
Clean the Bypass Feed Roller
If paper misfeeds frequently occur when feeding envelopes or heavy paper through the bypass tray, wipe the surface of the feed roller with a clean soft cloth moistened with water or a neutral detergent.
Use the Right Paper
Though there are many types of commercially-available paper, the use of non-recommended paper in your machine can result in misfeeds, poor image quality, and even damage to your device. Check your user manual for specific paper recommendations.


